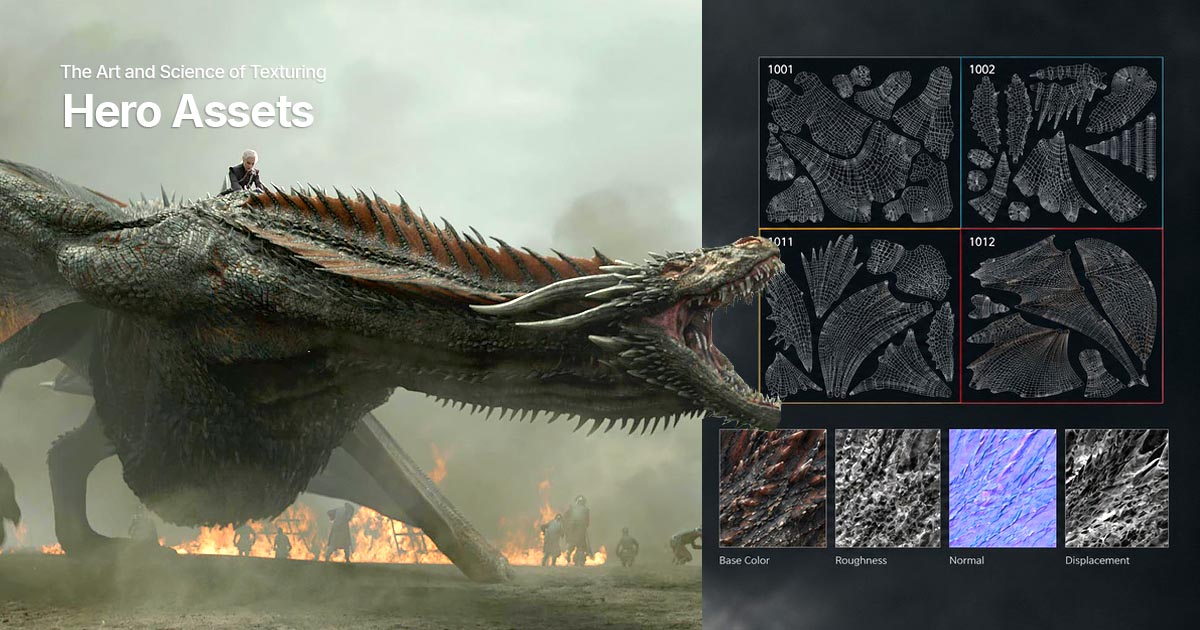
Hero asset texturing combines artistic judgment with technical control to create detailed, believable surfaces for characters, creatures, props, and other high-visibility models. This article explores surface detail, material definition, texture maps, sculpting, Look Development, and the workflows that help hero assets remain convincing under close inspection in film, animation, and games.
Why Hero Texturing Requires More Than Standard Texturing
In film and high-end animation, a model can be technically complete yet still fail to look convincing on screen. The geometry may be well sculpted, the UVs correctly prepared, and the shader properly configured, but the surface can remain visually flat, repetitive, or artificial.
This becomes particularly noticeable with Hero Assets: characters, creatures, props, and other models that receive significant screen time or appear in close-up shots. Their surfaces must communicate material, scale, age, biological characteristics, and interaction with the environment. A creature's skin, for example, needs to look different from the surface of a reptile's scales, while a weathered metal object requires an entirely different approach to surface variation.
Hero texturing is not necessarily a separate discipline that requires an entirely different set of software. Rather, it involves a more demanding combination of reference research, texture painting, material definition, sculpting, and Look Development. The workflow must be adapted to the asset, the intended visual style, and the demands of the final shot.
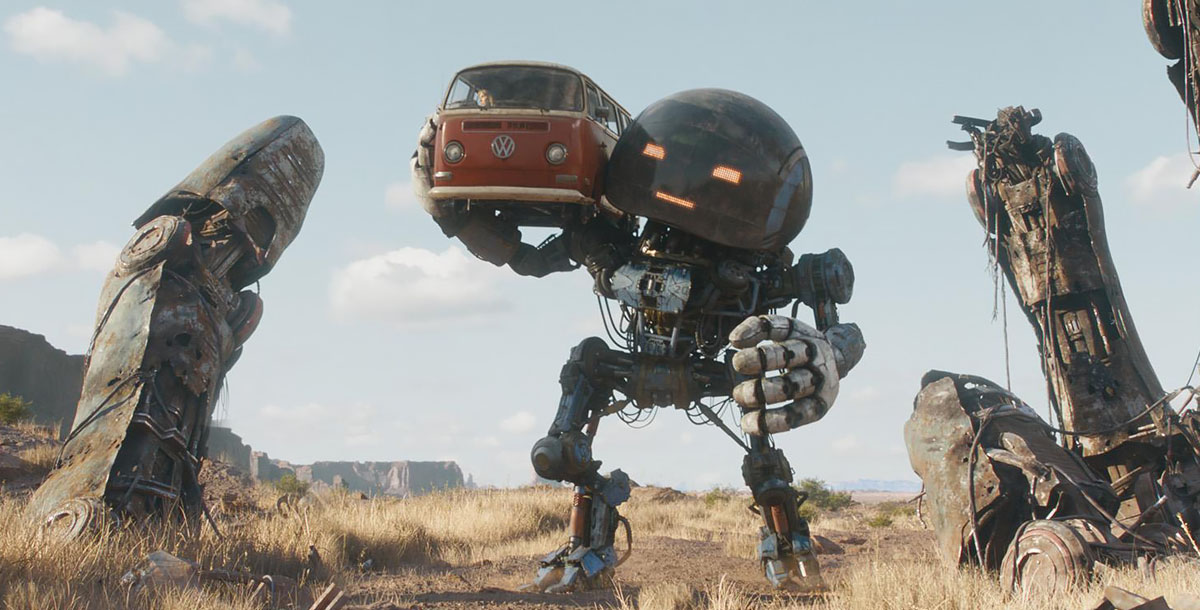 The Electric State (2025) — CG robot Herman by Digital Domain
1. The Art of Surface Detail
Large, Medium, and Fine Details
Convincing surfaces rarely result from adding as much detail as possible. They are built by organizing detail at different scales and ensuring that each level contributes to the overall appearance.
Large-scale details define the primary visual character of a surface. These might include broad color regions, major wrinkles, large scars, patches of discoloration, or the overall pattern of a creature's skin.
Medium-scale details introduce recognizable surface characteristics. Examples include clusters of scales, smaller folds, irregular patches, scratches, and variations between different regions of a material.
Fine details provide the final layer of complexity. These may include pores, tiny cracks, subtle surface irregularities, small color variations, and fine changes in roughness.
The three levels should work together rather than compete for attention. If fine details are too strong, they can overwhelm the larger forms. If every region has the same density of detail, the surface may appear procedural or repetitive rather than natural.
The appropriate balance also depends on camera distance. A detail that is clearly visible in a close-up may disappear in a wider shot, while excessive high-frequency detail can produce visual noise or unstable results during rendering.
Using Real-World References for Believable Surfaces
One of the most valuable resources for creating convincing organic textures is the natural world.
Artists can study high-quality photographs of animal skin, scales, eyes, wrinkles, scars, and other surface features to understand how real materials vary. Crocodiles, snakes, hippopotamuses, and whales offer very different examples of surface structure, coloration, and wear.
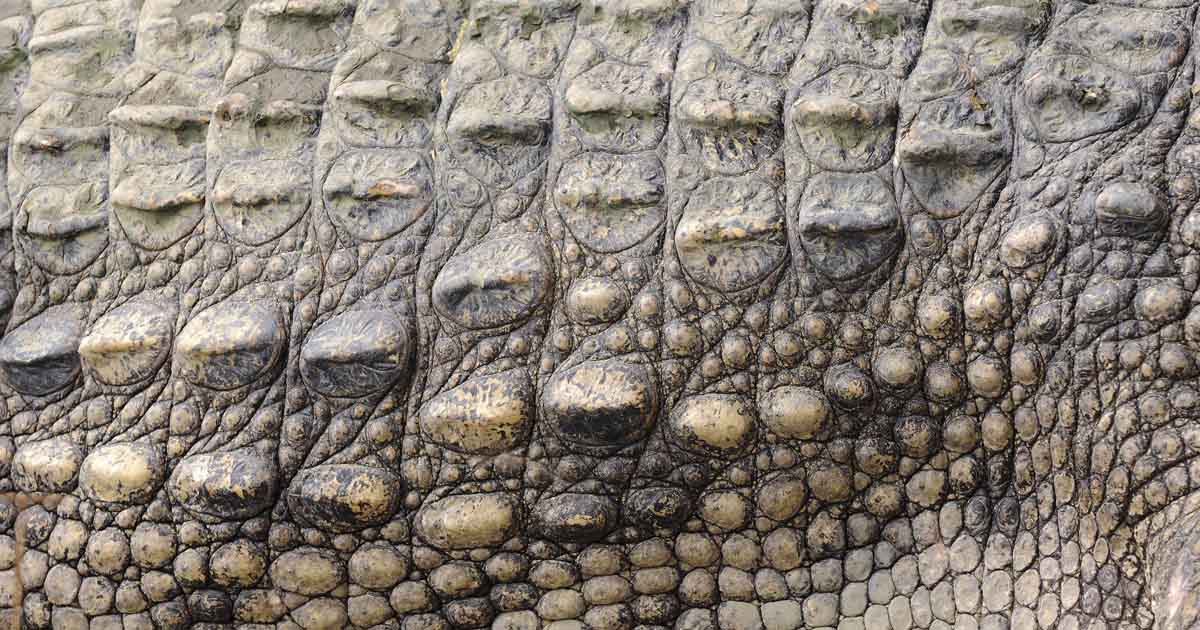
The objective is not simply to copy an animal's appearance. It is to understand the visual rules that make its surface believable.
For example, crocodile skin combines relatively large, structured scales with smaller irregularities and differences between regions of the body. Snake scales follow directional patterns that conform to the anatomy. Hippopotamus skin presents distinctive folds and variations in appearance depending on its condition and environment. Whale skin can show scars, pigmentation changes, and other features that communicate biological history.
These observations can inform the design of fictional creatures, even when the final model does not correspond directly to any real species.
Reference collection should therefore be deliberate. Artists should look for images that reveal the specific property they need to reproduce, rather than relying exclusively on attractive but visually ambiguous photographs.
Useful references may include:
-
High-resolution close-ups of skin and surface patterns.
-
Images showing different body regions and changes in scale or pattern.
-
Photographs under different lighting conditions.
-
References of wet and dry surfaces.
-
Images showing eyes, scars, wrinkles, and other distinctive features.
-
Photographs that help establish the physical scale of the details.
Whenever possible, references should provide consistent information about color, scale, and surface structure. Strongly stylized lighting, heavy color grading, and reflections can obscure the underlying material properties.
From Photographic Reference to 3D Texture
Collecting reference photographs is only the beginning. The challenge is translating two-dimensional images into texture maps that behave correctly on a three-dimensional model.
In a workflow involving Projection Painting, an artist projects an image onto the model and adjusts its placement to follow the surface. This can establish detailed color patterns quickly, especially when the reference contains features that would be difficult to recreate manually.
However, projected photographs rarely work perfectly without modification. The image may stretch across curved surfaces, produce visible seams, or contain lighting and shadows that do not belong in the final texture.
Artists therefore combine projected imagery with hand painting, masks, layered textures, and procedural techniques. They may remove unwanted highlights, correct perspective distortions, blend several photographs, and repaint areas where the image does not conform to the model's anatomy.
The process also requires attention to scale and direction. A pattern of scales that looks convincing in a photograph can appear oversized, stretched, or incorrectly oriented when transferred to a creature.
Most importantly, a photograph is not a complete material definition. It primarily records the appearance of a surface under particular lighting and viewing conditions. Additional work is needed to establish properties such as Roughness, Normal, and Displacement.
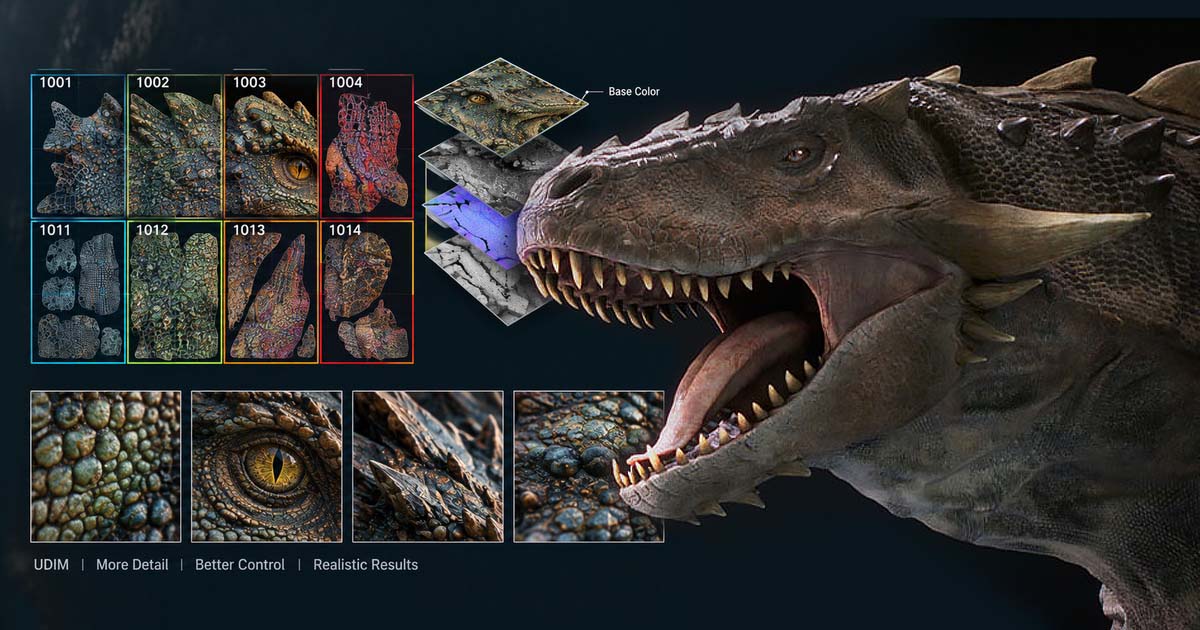
A useful technical reference for this kind of creature workflow is Pixar RenderMan's Creating the Razorback Whiptail, which discusses reference gathering, creature texturing, projection, procedural variation, and Look Development.
Combining Photographic, Hand-Painted, and Procedural Details
No single technique needs to create every detail.
Photographic textures can supply complex natural patterns. Hand painting allows artists to control the placement of important features, correct inconsistencies, and emphasize areas that matter to the design. Procedural techniques can generate repeatable patterns, masks, and controlled variations across large surfaces.
The strongest results often come from combining these approaches.
For example, a fictional reptilian creature might begin with photographic references for scale coloration. Projection Painting could establish the broad pattern, while hand painting refines transitions around the face and joints. Procedural masks could introduce controlled variations in color and roughness, and sculpted geometry could provide the larger physical relief of the scales.
The objective is not to make the surface look increasingly complicated. It is to build a coherent material whose details support the anatomy, design, and intended shot.
2. Texturing Beyond Base Color
A surface is not defined by its color alone. Its appearance also depends on how it reflects light, how its small-scale structure affects shading, and whether its physical relief is represented in geometry or texture maps.
Base Color
Base Color describes the surface's underlying color response without including direct lighting or specular highlights.
For organic assets, it can contain subtle differences in pigmentation, localized discoloration, spots, and other biological patterns. For manufactured objects, it may represent paint, coating, dirt coloration, or differences between materials.
A common mistake is painting strong highlights and shadows directly into Base Color. Unless those variations represent actual surface coloration, they may conflict with the lighting in the final shot and make the material appear flat or incorrectly lit.
Roughness
Roughness controls the spread and character of specular reflections. It is particularly important when distinguishing surfaces that have similar colors but different physical characteristics.
Skin, wet scales, dry scales, worn metal, polished metal, and painted surfaces can all respond differently to light. Roughness variation helps communicate these differences.
A uniform Roughness value across a complex organic creature can make the entire model appear coated in the same artificial material. Carefully controlled variation can help distinguish regions without introducing unnecessary color noise.
However, Roughness should not be varied randomly. Changes should be supported by the material's physical properties, surface condition, or artistic design.
Normal and Displacement
Normal maps influence the shading of a surface without requiring the full detail to be represented as additional geometry. They are useful for smaller features such as pores, fine wrinkles, and subtle surface irregularities.
Displacement changes the rendered surface position, allowing more substantial relief to affect the silhouette and physical appearance of the model, depending on the rendering workflow.
The distinction matters when deciding where detail belongs.
A broad wrinkle or prominent scale may need geometric or displacement detail to respond convincingly to light. Smaller pores may be better represented through Normal or Bump mapping. The correct choice depends on the feature's size, silhouette contribution, camera distance, and rendering requirements.
A highly detailed texture cannot compensate for every limitation in geometry. Equally, a finely sculpted model can still look artificial if its material response and color variation are poorly developed.
3. Specialized Tools and Techniques
Professional texturing workflows use tools according to their strengths. The choice depends on asset complexity, the required level of detail, the production pipeline, and the kind of surface being created.
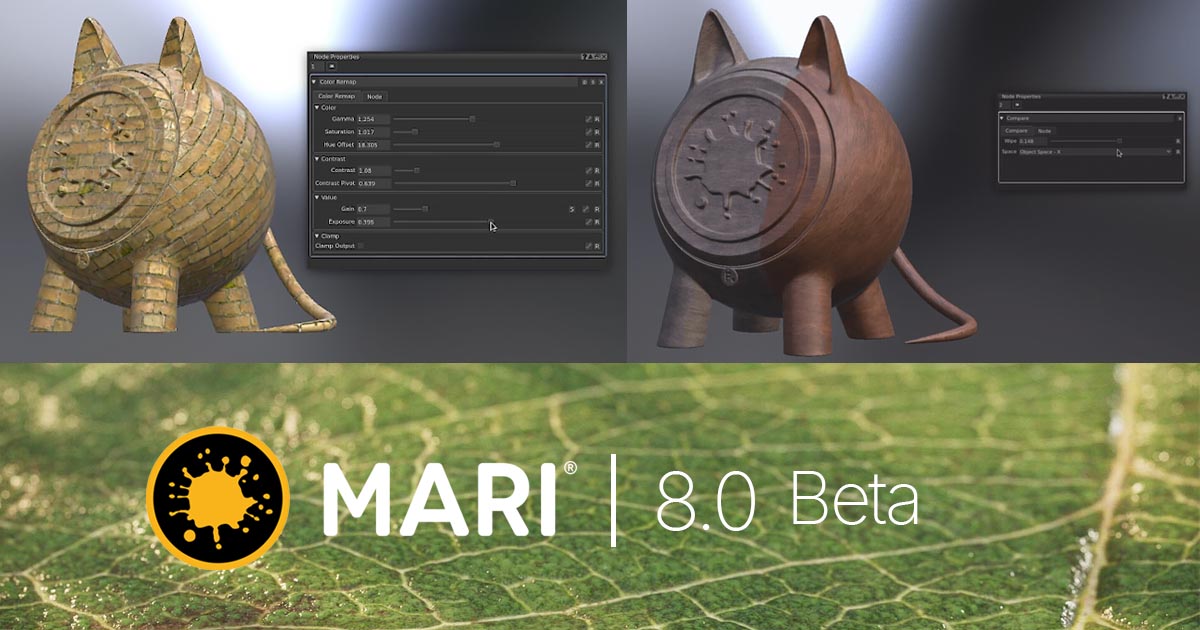
Mari: High-Detail Texture Painting
Mari is particularly relevant to complex film assets that require extensive texture painting and detailed control across large texture sets.
Foundry's account of the production of Avatar describes why Weta Digital needed a painting solution capable of handling the scale and complexity of the film's assets. The report documents extensive use of Mari, high-resolution texture sets, projection workflows, and multiple texture channels.
Read the production account: The 3D Painting Software Behind Avatar.
Mari supports workflows in which artists combine projected images, hand-painted details, masks, and procedural operations. This makes it useful for complex organic assets, including creatures and characters whose surfaces need extensive customization.
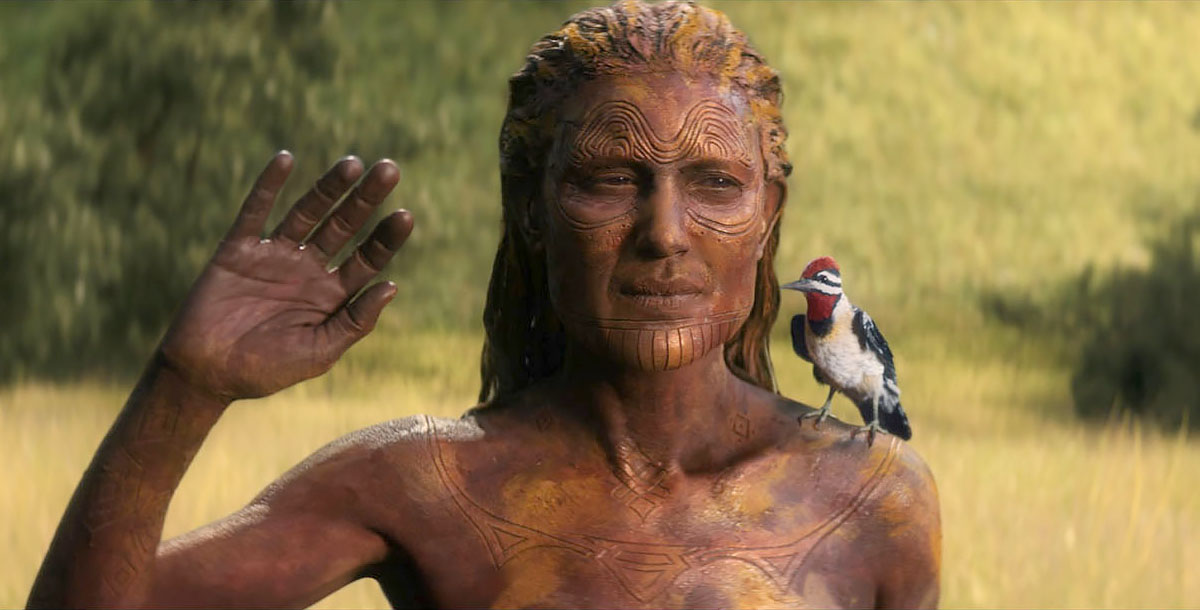
Its value is not simply that it can produce high-resolution textures. It also allows artists to work across complex models while maintaining control over how details are placed, blended, and revised.
For assets that require extensive texture coverage and high-resolution surface detail, UDIM workflows can help organize textures across multiple UV tiles. For a deeper explanation, read The Concept of UDIM & Its Application in Creating Realistic Details.
Substance 3D Painter: Layer-Based Texturing
Substance 3D Painter offers a different but complementary approach. Its layer-based workflow, masks, procedural generators, and Smart Materials can help artists establish surface characteristics efficiently and make controlled revisions.
It is useful for building material variation, combining hand-painted details with procedural effects, and creating repeatable surface treatments.
Painter is not limited to game production. Substance tools have also been documented in feature animation workflows. In its production interview about Next Gen, the Tangent Animation team discussed using Substance software in the texturing of a feature-length animated film.
Read the interview: Netflix's Next Gen: Substance Workflow for Feature Animation Film.
The important distinction is not that one application is universally better than the other. It is that different projects and assets benefit from different combinations of painting, procedural creation, and material-authoring techniques.
ZBrush: Sculpting and Surface Structure
ZBrush contributes to the workflow by creating and refining geometry.
Features such as prominent scales, deep wrinkles, skin folds, and other forms of physical relief may need to be sculpted rather than painted entirely into texture maps. These details can then be carried into the rendering pipeline through appropriate geometry, Normal, or Displacement workflows.
The boundary between geometry and texture is a practical artistic decision. If a feature needs to affect the silhouette or cast a meaningful shadow, representing it only as color is unlikely to be sufficient. If a feature is extremely small and does not need to alter the silhouette, a texture-based solution may be more efficient.
ZBrush, Mari, and Substance Painter therefore serve different roles that can complement one another within a single asset workflow.
Procedural Texturing as a Supporting Technique
Procedural methods can generate masks, patterns, and surface variations based on rules rather than relying exclusively on painted images.
They are particularly useful for adding controlled variation to repeated structures, creating material breakup, and extending details across complex surfaces.
However, procedural repetition can become visible when patterns are too uniform or unrelated to the anatomy. For Hero Assets, procedural results often need artistic direction and manual refinement to avoid an overly synthetic appearance.
The best approach is to use procedural methods where they offer genuine control or efficiency, then introduce deliberate variation wherever the design requires it.
4. Why Textures Look Artificial: Texture, Shader, Geometry, or Lighting?
When a model looks unconvincing, adding more texture detail is not always the answer. The problem may originate elsewhere in the asset or rendering pipeline.
When the Problem Is the Texture
Common warning signs include repetitive patterns, visible projection seams, stretched photographs, excessive noise, and color variation that does not follow the anatomy or material.
The solution may involve improving the reference selection, changing the projection approach, refining masks, or simplifying details that compete with the larger surface structure.
When the Problem Is the Shader
A well-painted Base Color can still look wrong if Roughness, specular response, or other material properties are inappropriate.
For example, a creature intended to have dry, rough skin may appear plastic if its reflections are too smooth or uniform. In this case, adding more pores or color variation may not address the underlying problem.
When the Problem Is Geometry
Texture maps cannot always replace the physical structure of the model. Major folds, protruding scales, deep wrinkles, and other silhouette-defining features may require changes to the sculpt or displacement setup.
The artist must decide whether the feature should be represented by geometry, a displacement map, a Normal map, or color alone.
When the Problem Is Lighting
Surface details are revealed differently under different lighting conditions. A material that looks convincing under neutral studio lighting may behave differently in a dark environment, a strong backlight, or a brightly lit exterior.
Look Development should therefore include tests under more than one lighting setup. Neutral lighting helps evaluate the material itself, while shot lighting reveals how the asset will contribute to the final image.
The key principle is to diagnose the cause before changing the texture. Professional results depend on the interaction between surface detail, material response, geometry, and light.
5. Case Studies: Hero Assets in Film Production
Avatar: Managing Detail at Production Scale
Avatar provides a documented example of how demanding large-scale film texturing can become.
According to Foundry's account of the film's production, up to 54 artists worked on painting the 2.5 million textures required for the models in Avatar. This illustrates the scale of the texturing workload involved in creating complex digital assets for a major VFX production.
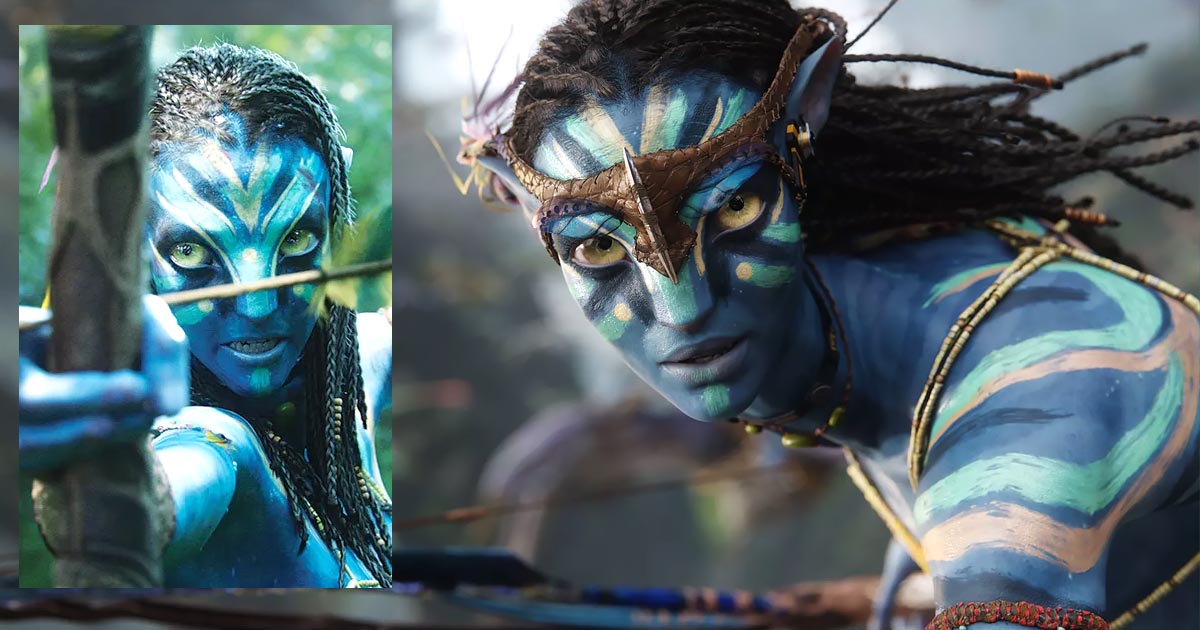
The article describes workflows involving reference material, concept art, projection cameras, high-resolution texture painting, multiple channels, and review cycles in which artists refined assets in response to creative feedback.
The lesson is not simply that Mari was used on a major film. It is that the complexity of the assets required a workflow capable of supporting extensive detail, revisions, and consistent results across a large production.
Source: The 3D Painting Software Behind Avatar — Foundry.
Blade Runner 2049: Balancing Procedural and Custom Texturing
Blade Runner 2049 illustrates another important principle: not every asset requires the same degree of bespoke work.
In its account of the film, Foundry describes how Framestore used Mari for hero texture work on buildings, vehicles, digital doubles, and other assets requiring customized treatment. The article also discusses a tiered approach in which procedural work provided a foundation for additional detail.
This is relevant to Hero Texturing because production time and visual importance must be balanced. An asset that occupies a significant portion of the frame may justify more detailed and customized work than an asset that remains distant or partially obscured.
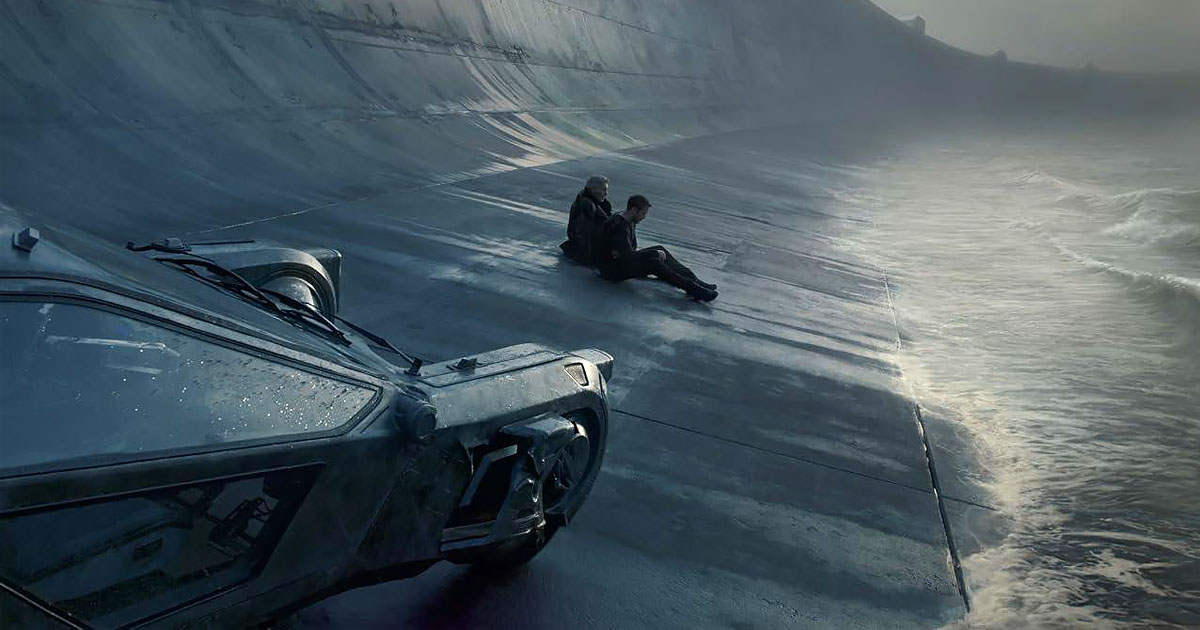
The workflow must also accommodate changing camera positions, artistic direction, and shot requirements. Non-destructive techniques and the ability to revise work efficiently become important production considerations.
Source: How Mari Was Used to Bring Blade Runner 2049 to Life — Foundry.
Razorback Whiptail: Connecting Texturing and Look Development
Pixar RenderMan's Razorback Whiptail tutorial offers a more technical look at the relationship between sculpting, texturing, and shading.
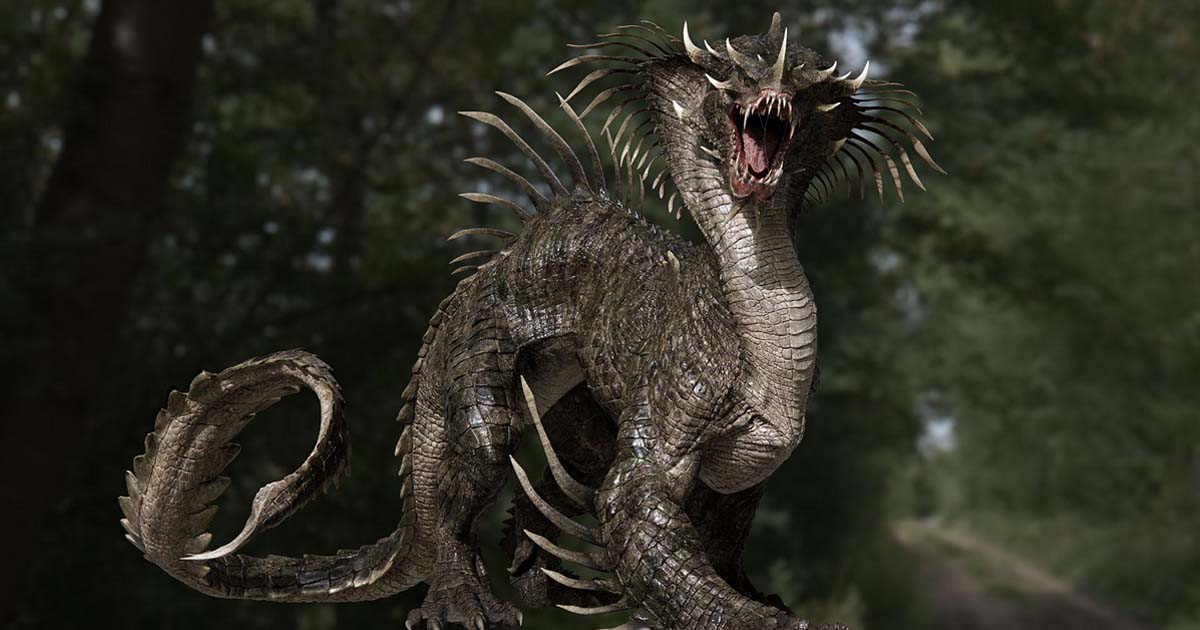 Artwork by Matteo Llorens. Razorback Whiptail model by Kurtis Dawe. Source: Pixar RenderMan
The documented workflow combines utility masks generated with Substance Painter, Normal and Displacement outputs from ZBrush, and painting and procedural operations in Mari. Different maps contribute to color variation, surface relief, and roughness, while the Look Development stage evaluates how the resulting asset responds to lighting.
This example demonstrates why a creature's appearance cannot be attributed to a single texture map or application. The final result emerges from coordinated decisions across geometry, texture, material response, and rendering.
6. From Texturing to the Final Shot
A texture is not finished simply because it looks attractive in the painting application. It must perform under the conditions in which the asset will be rendered.
Evaluate the Asset at Different Camera Distances
Inspect the model in close-up, medium, and wide views. Details that look impressive in the texture viewport may become distracting at the intended camera distance. Conversely, important features may disappear when the asset is viewed in the final composition.
The texture should support the shots in which the asset appears, rather than being designed exclusively for an isolated turntable render.
Test Materials Under Different Lighting Conditions
Neutral lighting can help identify problems with color and material response, while more varied lighting reveals how the surface behaves in different environments.
A material should not depend on one particular lighting setup to appear convincing. At the same time, the final shot remains the most important reference for determining whether the asset works in context.
Coordinate Texture, Lookdev, and Lighting
Texture Artists establish surface detail and material maps, while Look Development determines how those maps work with shaders and rendering. Lighting then reveals the asset within the intended visual environment.
These responsibilities overlap, and adjustments may move between departments as the asset develops. Consistent communication is essential when a problem appears to originate in one stage but is caused by another.
Prepare for Review and Revision
Hero Assets often require repeated evaluation and refinement. Changes to the model, camera, or creative direction may affect the texture requirements.
A reliable workflow should preserve the ability to revise materials, adjust masks, update texture maps, and maintain consistency across the asset. Clear naming, organized channels, and predictable publishing procedures also help reduce errors during handoff.
The goal is not merely to create a detailed surface. It is to deliver an asset that remains convincing, manageable, and production-ready throughout the shot workflow.
7. Conclusion: What Makes Hero Texturing Different?
Hero Texturing is not defined by a particular software package, a maximum texture resolution, or the quantity of detail painted onto a model.
Its real challenge is to create surfaces that communicate the correct material and character while remaining believable under the camera, lighting, and rendering conditions of the final production.
That requires careful reference research, an understanding of surface structure, thoughtful use of photographic and procedural methods, and the ability to distinguish between details that belong in texture maps and those that require geometry or shading adjustments.
Tools such as Mari, Substance 3D Painter, and ZBrush can support different parts of this process, but no application replaces the artist's ability to observe, interpret, and make decisions about a surface.
Ultimately, convincing Hero Assets are built by combining technical control with artistic judgment. The objective is not to create the most detailed texture possible, but to create the right surface for the model, the material, and the shot.
 References & Further Reading

Sadjad Jahangiri 





Add comment